Saturday, January 23, 2016

digital photography- Shutter speed..

digital photography- Shutter speed..

What is shutter speed...?????

The camera's shutter speed, the lens's brightness (f-number), and the scene's luminance together determine the amount of light that reaches the film or sensor (the exposure). Exposure value (EV) is a single quantity that accounts for the shutter speed and the f-number.
Multiple combinations of shutter speed and f-number can give the same exposure value. Doubling the exposure time doubles the amount of light (subtracts 1 EV). Making the f-number one stop brighter (reducing the f-number by a factor of \scriptstyle \sqrt{2}) also doubles the amount of light. A shutter speed of 1/50 s with an f/4.0 lens gives the same exposure value as a 1/100 s shutter with an f/2.8 lens, and also the same exposure value as a 1/200 s shutter with an f/2.0 lens.
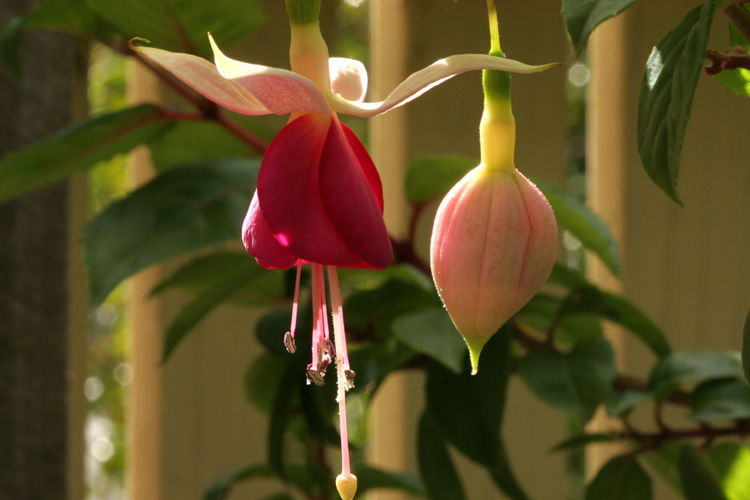
In addition to its effect on exposure, the shutter speed changes the way movement appears in photographs. Very short shutter speeds can be used to freeze fast-moving subjects, for example at sporting events. Very long shutter speeds are used to intentionally blur a moving subject for artistic effect.[2] Short exposure times are sometimes called "fast", and long exposure times "slow".
Adjustment to the aperture controls the depth of field, the distance range over which objects are acceptably sharp; such adjustments need to be compensated by changes in the shutter speed.
In early days of photography, available shutter speeds were not standardized, though a typical sequence might have been 1/10 s, 1/25 s, 1/50 s, 1/100 s, 1/200 s and 1/500 s. Following the adoption of a standardized way of representing aperture so that each major step exactly doubled or halved the amount of light entering the camera (f/2.8, f/4,f/5.6, f/8, f/11, f/16, etc.), a standardized 2:1 scale was adopted for shutter speed so that opening one aperture stop and reducing the shutter speed by one step resulted in the identical exposure. The agreed standards for shutter speeds are:[3]
  • 1/1000 s
  • 1/500 s
  • 1/250 s
  • 1/125 s
  • 1/60 s
  • 1/30 s
  • 1/15 s
  • 1/8 s
  • 1/4 s
  • 1/2 s
  • 1 s
An extended exposure can also allow photographers to catch brief flashes of light, as seen here. Exposure time 15 seconds.
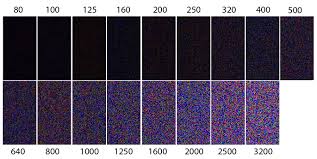
With this scale, each increment roughly doubles the amount of light (longer time) or halves it (shorter time).
Camera shutters often include one or two other settings for making very long exposures:
  • B (for bulb) keeps the shutter open as long as the shutter release is held.
  • T (for time) keeps the shutter open until the shutter release is pressed again.
The ability of the photographer to take images without noticeable blurring by camera movement is an important parameter in the choice of slowest possible shutter speed for a handheld camera. The rough guide used by most 35 mm photographers is that the slowest shutter speed that can be used easily without much blur due to camera shake is the shutter speed numerically closest to the lens focal length. For example, for handheld use of a 35 mm camera with a 50 mm normal lens, the closest shutter speed is 1/60 s. This rule can be augmented with knowledge of the intended application for the photograph, an image intended for significant enlargement and closeup viewing would require faster shutter speeds to avoid obvious blur. Through practice and special techniques such as bracing the camera, arms, or body to minimize camera movement longer shutter speeds can be used without blur. If a shutter speed is too slow for hand holding, a camera support, usually a tripod, must be used. Image stabilization can often permit the use of shutter speeds 3–4 stops slower (exposures 8–16 times longer).
Shutter priority refers to a shooting mode used in semi-automatic cameras. It allows the photographer to choose a shutter speed setting and allow the camera to decide the correct aperture. This is sometimes referred to as Shutter Speed Priority Auto Exposure, or TV (time value) mode.

Why white balance is imp in digital photography...?????

                                      white balance in D-SLR


Definition: Determination of the exact color adjustment necessary for a digital camera to render a pure white object so that it appears pure white in the captured image.


The assumption is that if white is rendered correctly, all of the other colors will be also. Conversely, if white has a color cast, it doesn’t matter if the other colors are right—the picture will look wrong.
Lo, the human brain! Among its many wonderful talents, your brain has the ability to restore proper coloration to most of the physical objects your eyes see. If you’ve ever shot daylight-balanced 35mm film under normal tungsten incandescent light you doubtlessly produced images that were brownish-reddish—even though the scene looked normal when you viewed it firsthand. Psychologists have told me the brain makes “corrections” to the signals it receives from the eyes because that’s way the brain copes with altered reality. Your brain replaced the blue coloration that was missing from the scene because it needed to keep things normal-looking.
This ability may be rooted in our evolution from animals that needed to be able to detect subtle color differences in plants so that they could determine which were edible, ripe or spoiled regardless of the time of day or lighting conditions. That’s just my guess, but I’m sticking with it since most human characteristics are one way or another related to survival.
Cameras need help to make these adjustments. Yes, many have Auto White Balance settings. But like many of the other Auto settings, the results are usually pretty close but rarely dead-on accurate. Cameras also offer Preset and Custom settings. More on those later.
First, let’s dispel the misconception that you can easily correct for White Balance miscalculations by using Photoshop. Experts can salvage some poorly balanced images and many people can make the images look better, but there’s no substitute for getting the white balance set correctly in the first place.
White Balance is not difficult to do or hard to understand. In fact, at the most basic level, all you really need to consider are three colors: our old friends R, G and B.
The spectrum of visible light ranges from R (red) to B (blue), or more correctly, from near-infrared to near-ultraviolet. Light color is determined by its wavelength, so it can be objectively measured, filtered and altered. White is a mixture of all colors (even though that may sound counterintuitive). Pure white objects reflect all incident light in the 400-700nm (nanometer) range.
Color is objectively identified by its temperature, which is expressed in degrees Kelvin. A color temperature meter will tell you that noon daylight is around 5,500 degrees and that normal room light generate by a GESoftwhite tungsten light bulb is closer to 2,900 degrees. On a cloudy day, the color temp might be in the 6,600 to 8,800 range. We call reddish light in the 3,000 degree range “warm” and bluish light in the higher 7,000 degree area “cool” even though the numerical value of the cooler temperature is higher. Remember it this way: fire is red and warm; ice is blue and cool. Despite the fact the labels are opposite of what the Kelvin thermometer suggests.
We forgot green, and sadly, many color temperature measuring devices do likewise. In reality it’s as important to achieve the correct balance between Green and Magenta as it is between Red and Blue. In the old says, color temperature meters—with the notable exception of the tri-color Minolta Color Meter III—could read only Red and Blue. Which was largely okay because fluorescent lights were rarely used in the home (except in the garage).
These days the color-impaired CFL—aside from creating an environmental disaster when eventually broken—wreaks havoc on rational attempts to achieve white balance. CFL, at least some of them, burn with a ghostly greenish glow. Others are bluish-green. Some are alleged to be daylight balanced but lose traction with photographers because a) it can take 15 minutes for them to warm up and reach their operating temperature and b) their color can shift as they age. Use at your own risk.
Digital cameras allow the user to choose from Preset settings that match the average conditions found in common situations. You usually find Daylight, Cloudy, Shade, Tungsten (Incandescent) and a Fluorescent option or two. Sometimes there will be a setting for Flash and always one marked Auto. Better cameras (including virtually all digital SLRs) provide Custom White Balance which is sometimes called “Present Manual.” And some cameras allow you to select from a range of color temperatures by choosing the degrees Kelvin from a scale that starts around 2,000 degrees and tops out at about 10,000.
The Custom (or Present Manual) gets its white point value through a procedure whereby you point the camera at a solid pure white object—often a sheet of paper. The exact process differs from camera to camera, so refer to your owner’s manual. This is almost always the single most accurate way to set White Balance. Auto is the worst. The other presets, if correctly set to match conditions, range from fair to okay.
The image that shows six panels of fruit (image left) was shot in shaded daylight with a Nikon D70s at the following settings (starting upper left): Preset Manual (Custom), Incandescent, Fluorescent. Second row: Direct Sunlight, Cloudy, Shade. The Shade preset is amazingly close (in fact, some may prefer it). The point is this: until you experiment and shoot the same scene with every different setting you have only a vague idea how they differ.
If your camera lets you pick the color temperature in Kelvin degrees, or has another mechanism that enables fine-tuning, you can have a lot of fun and enjoy substantial creative expression.
Avoid mixed light sources if at all possible. It’s extraordinarily difficult to achieve white balance in a scene illuminated by a blend of daylight, tungsten and fluorescent. The shot of the Colony Hotel, South Beach (image right) is a good example where the Auto setting produced good results. It was shot with a Panasonic TZ-7 (US name is Lumix DMC-ZS3).
Jon Sienkiewicz - South Beach
Add caption


Sunsets and sunrises are dramatically influenced by shifts in white balance. Remember that when the sun sets, we still see its red, glowing orb even after it has physically slipped below the horizon. That’s because the long red wavelengths are diffracting—essentially “bending” over the horizon line—long after the star itself has disappeared. All of that light is red. A dissimilar thing happens at sunrise. For creative exercise, set your camera on a tripod, face the sunrise, and make exposures using every available White Balance option. Work quickly, because the color temperature of the light will change as you watch. If your camera allows Custom (Manual Preset) use that setting first to establish a baseline. Wait until sunset and repeat. This will usually require turning to face the opposite direction.
Creative Project

Try to use the settings in the order that they appear on the menu or dial, or write down the order that you use them. Lacking that, use the browser software that came with your camera to review the images. It will allow you to read the Metadata where you’ll find a record of the White Balance setting associated with each image.

What is importance of Aperture in digital photography...????

Introduction to Aperture in Digital Photography

put most simply – Aperture is ‘the size of the opening in the lens when a picture is taken.’
When you hit the shutter release button of your camera a hole opens up that allows your cameras image sensor to catch a glimpse of the scene you’re wanting to capture. The aperture that you set impacts the size of that hole. The larger the hole the more light that gets in – the smaller the hole the less light.
Aperture is measured in ‘f-stops’. You’ll often see them referred to here at Digital Photography School as f/number – for example f/2.8, f/4, f/5.6,f/8,f/22 etc. Moving from one f-stop to the next doubles or halves the size of the amount of opening in your lens (and the amount of light getting through). Keep in mind that a change in shutter speed from one stop to the next doubles or halves the amount of light that gets in also – this means if you increase one and decrease the other you let the same amount of light in – very handy to keep in mind).
One thing that causes a lot of new photographers confusion is that large apertures (where lots of light gets through) are given f/stop smaller numbers and smaller apertures (where less light gets through) have larger f-stop numbers. So f/2.8 is in fact a much larger aperture than f/22. It seems the wrong way around when you first hear it but you’ll get the hang of it.


Depth of Field and Aperture

There are a number of results of changing the aperture of your shots that you’ll want to keep in mind as you consider your setting but the most noticeable one will be the depth of field that your shot will have.
Depth of Field (DOF) is that amount of your shot that will be in focus. Large depth of field means that most of your image will be in focus whether it’s close to your camera or far away (like the picture to the left where both the foreground and background are largely in focus – taken with an aperture of f/22).
Small (or shallow) depth of field means that only part of the image will be in focus and the rest will be fuzzy (like in the flower at the top of this post (click to enlarge). You’ll see in it that the tip of the yellow stems are in focus but even though they are only 1cm or so behind them that the petals are out of focus. This is a very shallow depth of field and was taken with an aperture of f/4.5).
Aperture has a big impact upon depth of field. Large aperture (remember it’s a smaller number) will decrease depth of field while small aperture (larger numbers) will give you larger depth of field.
It can be a little confusing at first but the way I remember it is that small numbers mean small DOF and large numbers mean large DOF.
Let me illustrate this with two pictures I took earlier this week in my garden of two flowers.
The first picture below (click them to enlarge) on the left was taken with an aperture of f/22 and the second one was taken with an aperture of f/2.8. The difference is quite obvious. The f/22 picture has both the flower and the bud in focus and you’re able to make out the shape of the fence and leaves in the background.
The f/2.8 shot (2nd one) has the left flower in focus (or parts of it) but the depth of field is very shallow and the background is thrown out of focus and the bud to the right of the flower is also less in focus due to it being slightly further away from the camera when the shot was taken.
F-22F-2.8
The best way to get your head around aperture is to get your camera out and do some experimenting. Go outside and find a spot where you’ve got items close to you as well as far away and take a series of shots with different aperture settings from the smallest setting to the largest. You’ll quickly see the impact that it can have and the usefulness of being able to control aperture.

Some styles of photography require large depths of field (and small Apertures)

For example in most landscape photography you’ll see small aperture settings (large numbers) selected by photographers. This ensures that from the foreground to the horizon is relatively in focus.
On the other hand in portrait photography it can be very handy to have your subject perfectly in focus but to have a nice blurry background in order to ensure that your subject is the main focal point and that other elements in the shot are not distracting. In this case you’d choose a large aperture (small number) to ensure a shallow depth of field.
Macro photographers tend to be big users of large apertures to ensure that the element of their subject that they are focusing in on totally captures the attention of the viewer of their images while the rest of the image is completely thrown out of focus.

device that controls the amount of light admitted through an opening. In photography and digital photography, aperture is the unit of measurement that defines the size of the opening in the lens that can be adjusted to control the amount of light reaching the film or digital sensor. The size of the aperture is measured in F-stop.

What is importance of ISO in Photography...????

ISO is actually a common short name for the International Organisation for Standardization.
The ISO setting on your camera is something that has carried over from film. Remember back in the ‘old days’ when you used to go and buy your rolls of film and you would buy film rated at 100, 200 or 400, maybe even 800 or 1600? Well that number refers to the film’s sensitivity to light. The higher the number, the more sensitive to light the film is. The ISO bit is from the standards for film sensitivity, and the number refers to it’s rating.


So what does sensitivity mean? Well a low sensitivity means that the film has to be exposed to light for a longer period of time than a film with a high sensitivity in order to properly expose the image. With a lower sensitivity you also get a better quality image too which is why you should always try and use the lowest sensitivity you can get away with. Let’s not get ahead of ourselves though, a little more explanation is required.
You might remember buying film for a sunny holiday and the shop assistant would recommend using a film rated at 100 or 200. If, on the other hand, you were going to be taking pictures indoors, then you might be recommended a higher sensitivity like 400 or maybe 800. If you used ISO100 film and decided to take some pictures indoors, chances are you would need to use the flash, or your pictures would come out quite dark. This is because the film’s sensitivity is so low that the shutter would need to be open for a long time to let enough light in. Your camera may not have had the features to allow it to keep the shutter open for long enough, which is why you ended up with dark pictures.
This was one of the problems with film. Once you’d loaded it into your camera, you were pretty much stuck with that film sensitivity for 24 or 36 shots.
Bring on digital cameras and you can now change the ISO setting for each shot you take. That is one of the big advantages of digital photography.
So why do you only get choices like 100, 200, 400, 800, 1600 and maybe 3200 when it’s digital, surely you could set 154 or 958 if you wanted it? It’s only electrical currents and circuits after all, not a piece of film. Well, in theory you could choose any setting you wanted, but imagine how tricky that would be. There are three settings which combine to give you the exposure, these are ApertureShutter Speedand ISO. Each one can be changed individually to allow you to set then to what you think will give you the perfect exposure, or you can let the camera set them for you to what it thinks is the perfect exposure for the conditions it can detect. Already with three different options, each having several settings themselves, the combinations are numerous, so keeping ISO to set values, which people will understand makes it a little less confusing.
Now, I mentioned quality too, and that better quality images are achieved with a lower ISO number. If, again, you go back to film days you may remember the sort of grainy effect some images had. Well this grain effect is what is introduced with a higher sensitivity film. Digital has it’s own grain effect with higher sensitivity and is known as Noise. Digital noise can be seen a sort of speckley effect in areas of similar colour, like skies or dark shadow areas. It is a subject of much discussion and the camera is often judged on the amount of noise it produces at these higher sensitivities. This is why you should always try and keep your ISO set to the lowest number, and use aperture and shutter speed to get the right exposure. If you can’t do that with aperture or shutter speed, move up to the next ISO setting and try again. One of the big selling points about digital cameras is how they handle the digital noise at higher ISO settings. The top pro level cameras from Nikon or Canon will have better control over noise than the cheaper models and this allows the pros (or anyone that can afford a Nikon D3 or Canon 1Ds for example) to get away with using a higher ISO and still getting good enough quality for print.
Why is a high ISO setting needed? Well for indoor work, where flash isn’t allowed and the light levels are fairly low. Or you can use it deliberately to get the grainy gritty feel to the image (although I would prefer to add this later on the computer).
It’s well worth experimenting with ISO settings so you can see just how your camera performs at the various levels. Once you have got to grips with how changing Aperture, Shutter Speed and ISO effect your image, you’ve pretty much got all the technical fundamentals nailed.
Over at the Digital Photography School Blog there is a nice post on how to choose the right ISO setting which is worth checking out. My rule of thumb is to keep the setting as low as possible until you absolutely need to increase it in order to get the shutter speed you need. Just remember to turn it back down low again when conditions get better.

Friday, August 23, 2013

Importance of photography in 2013

The photograph is the foundation on which the photosimulation is based. There are many aspects of the photography that should be considered, such as viewpoint selection, focal length and image size, and establishing scale and placement.
When Previsualists photographs a site, we survey the site for key reference points and provide scale and placement for the photosims. We use digital cameras with calibrated lenses, aerial photography, clinometers, digital laser range finders, a theodolite, survey poles, markers, and whatever other tools we need to establish exact scale and placement of the project. We do not believe that guessing on scale or placement is an ethical approach to doing photosims.
Photography can be very deceiving, and can skew reality. It is our job to minimize the natural distortions that occur when we convert a three dimensional world onto a flat piece of paper. There are always issues of perspective - the perception of an object being smaller because it is further away. Many things can influence the problems that perspective can have on a photograph. If you stand very far away from an object and use a telephoto lens, the object may be the exact same size on the page as if you stood right in front of it with a wide angle lens. However, the surrounding environment can appear completely different. See this graphic to help illustrate the concept. Since this can dramatically affect the way the object is perceived as fitting into its environment, it is very important to use the most representative focal length and carefully select the place from which the photograph is taken - the viewpoint.
Viewpoint selection is a very important part of every photosim. Before we photograph a site, we need to know the purpose of the photosim. A photosim usually answers a question such as:
What part will be visible from my house?
How will it appear to passing motorists?
Will any of it be visible over the trees?
How big is it going to be?
Will it blend in with the surroundings?
What kind of landscaping or fencing is it going to have?
Overall, what is it going to look like?
The viewpoints should be selected to answer the questions that are specific to that site, and each site is unique. Obviously a site that is being built next to a scenic corridor will be handled differently than one that is built in an industrial area. Or a site built in a residential area will have different considerations than one in a downtown district. To select the best viewpoints for the photosims it takes experience with jurisdictions, proponents and opponents, an in-depth knowledge of photography and surveying and an understanding of the project. Oh, and it doesn't hurt to have a little common sense.
While we will accept projects in which the client has provided the photography, we have found that we can dramatically increase the accuracy and quality of the photosims by providing the photographic services ourselves.